


A complete guide on how to stake OSMO: Tips and Tricks

Today you will learn everything you need to know about how to stake OSMO step by step, in order to maximize the potential of staking OSMO, the native token of Osmosis.
Stay tuned to discover useful tips that will help you increase your OSMO passive income while also contributing to the security of the Osmosis network.
Why stake OSMO?
- By staking OSMO from your own wallet, you own your OSMO tokens as only you have access to your private keys.
- You have the ability to choose one or multiple validators.
- You can participate in Osmosis governance.
- You are eligible for OSMO stakers airdrops as long as you meet the requirements.
- You can engage in OSMO liquid staking to explore the DeFi options within the Cosmos ecosystem without unbonding your staking.
- You will increase your understanding of the decentralized world and its advantages.
Avoid staking OSMO through centralized entities
Centralized exchanges (CEXs) may seem convenient and advantageous at first glance, however, there are reasons to avoid staking through a CEX:
- You are not the custodian of your OSMO, they are in the hands of exchanges that use their own public addresses to store the funds of all their users.
- You are not eligible for airdrops that include OSMO stakers, as airdrop rewards are allocated to public addresses that were active during snapshots.
- You cannot choose the best validator or participate in Osmosis governance.
How to stake OSMO in 5 easy steps
1. Install your Keplr wallet
For OSMO staking, you will need to have a compatible wallet. You can opt for Keplr, as it is currently the wallet with the most integrations and facilities for commission payments and IBC transfers. To install it, just follow the steps in our guide on how to use the Keplr Wallet.
Before you start, you can also explore the calculator provided by Stakely, to calculate your monthly or annual rewards in OSMO and other currencies.
2. Go to the Keplr Dashboard
There are two ways to access the Keplr Wallet dashboard:
- Through the Osmosis Zone website by selecting the 'Stake' menu.
- Through your Keplr extension, by selecting the blue 'Stake' button.
In both cases, a tab will open in your browser to take you to the Osmosis section in Keplr.
3. Choose Stakely as validator
This is what the OSMO staking area currently looks like (you can change the dark mode in the bottom left corner). Scroll down to see the list of validators and choose which one to stake OSMO to. This guide with 7 keys to choosing the best validator may be useful if you need help with your selection.
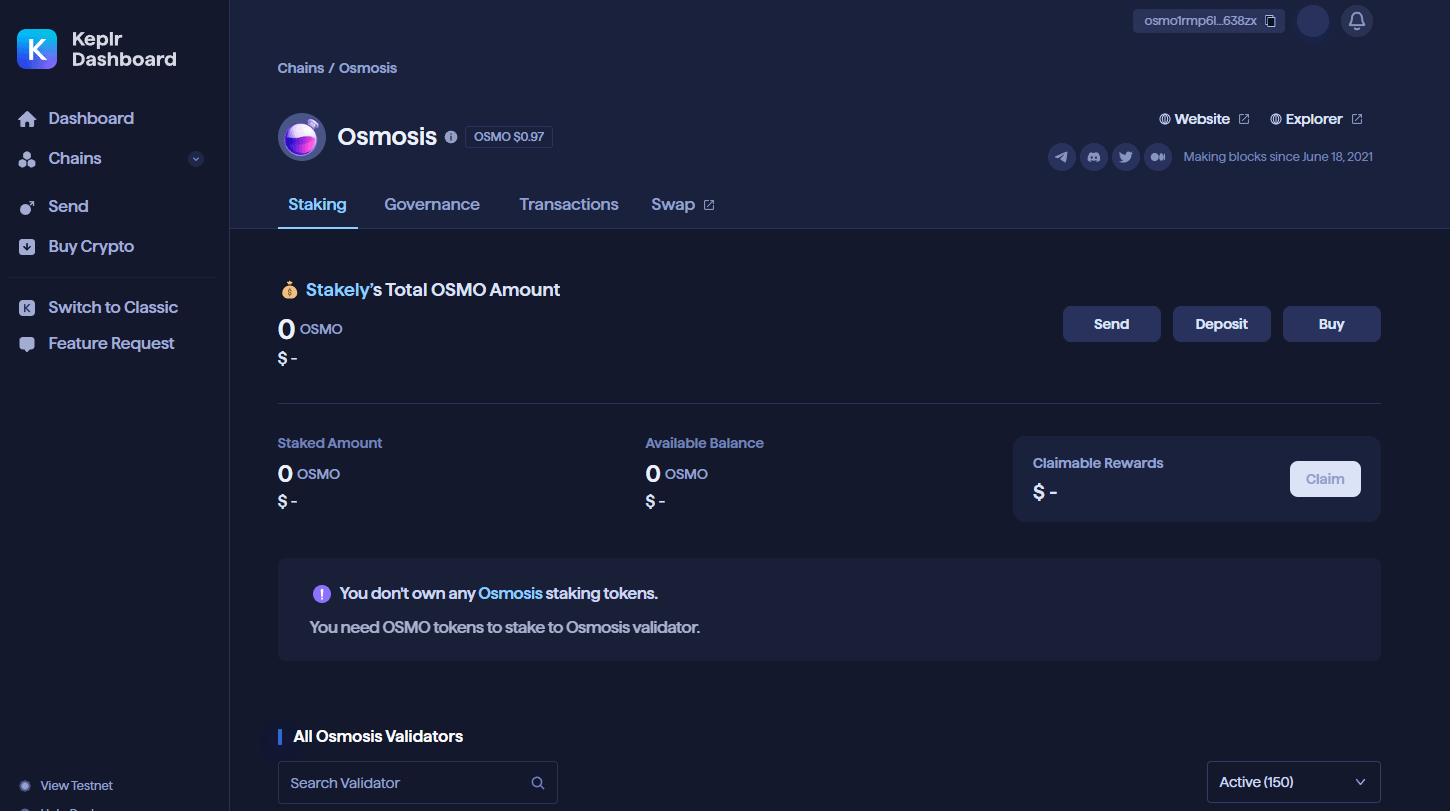
Once you have chosen a validator, select Manage:

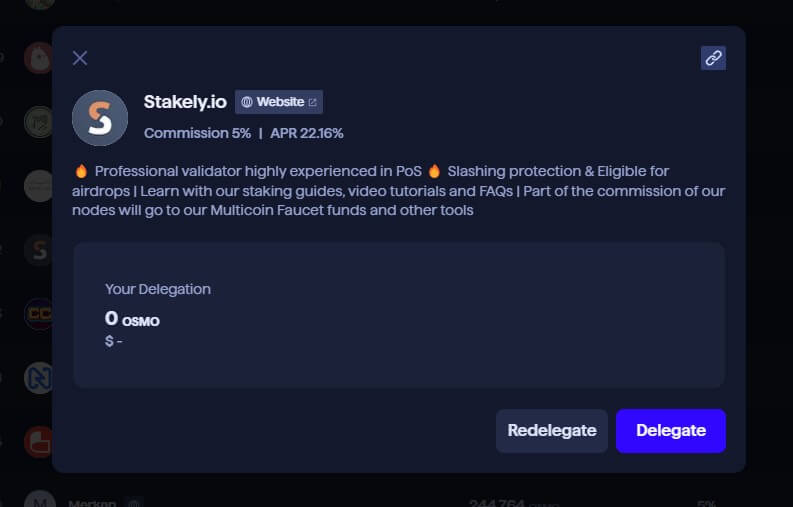
A pop-up window will appear with the information of the chosen validator. Click on Delegate and continue.
4. Enter the amount of OSMO you want to stake
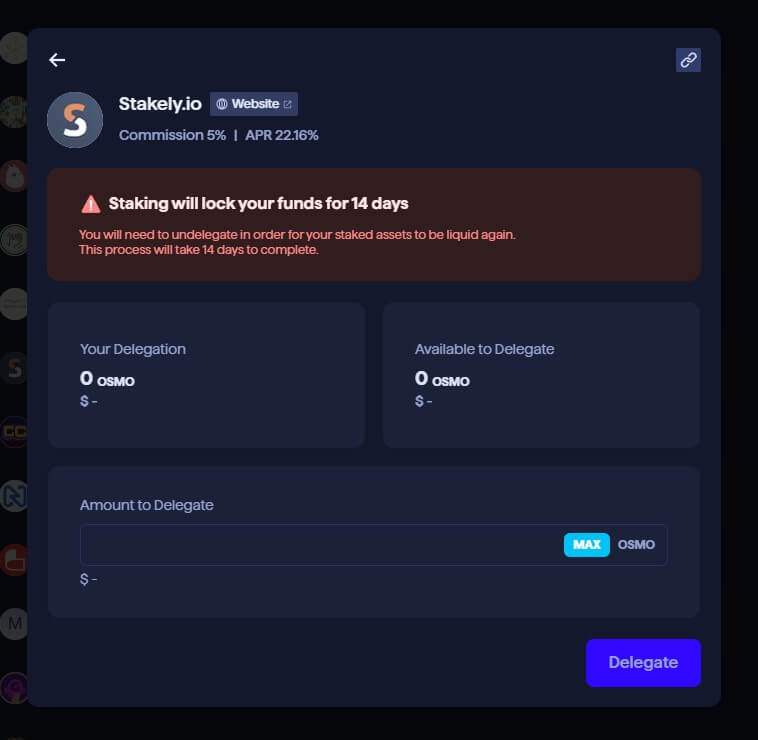
Choose the amount of OSMO you want to stake (the amount is already on your Keplr wallet, so you don't have to deposit it on the Keplr dashboard, as you are interacting natively with the Osmosis protocol). You will see that amount in the Available to Delegate section. Then, click on the blue Delegate button.
You will see in red highlighted information about how long your funds will be locked in case you wish to undelegate your OSMO. Please note that as soon as you click 'Undelegate', the countdown will start and during the unlink time, you will not receive staking rewards.
5. Approve on Keplr
And that's it! You have successfully staked OSMO.
Tips to keep in mind when staking OSMO
Once you have delegated your tokens, Keplr will activate a tab where you can view information related to your validator selection. You will be able to see your validator(s), the amount of OSMO staked, and the pending rewards to be claimed.

The redelegate function can be useful in case your validator goes jail.
How to redelegate or undelegate OSMO
To make a validator change, keep in mind that you can make an instant change for each elapsed unbonding period. For example, if you chose a validator today to stake OSMO, you can make a validator change tomorrow, and the change will be executed immediately. However, if you try to redelegate and make another change the next day, you will have to wait 14 days in the case of Osmosis, or a period equal to the unbonding period that corresponds to the project.
To redelegate or undelegate OSMO in Osmosis, follow the steps below:
- In the
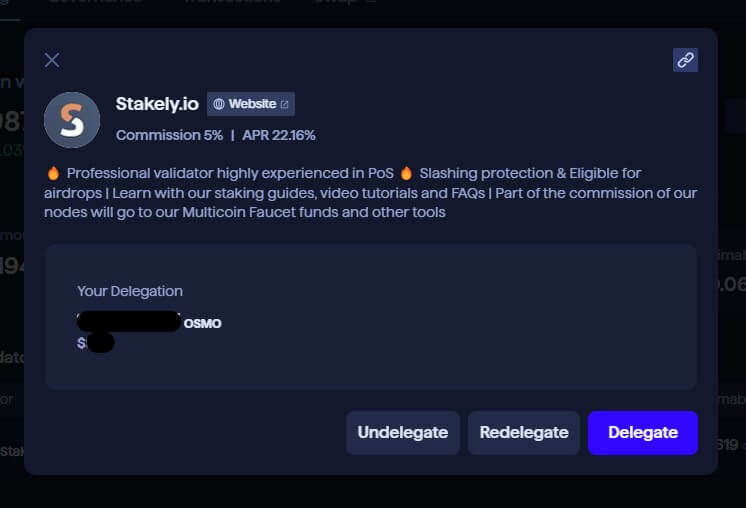
My validatorssection, you will see the rewards generated by staking Osmosis and theManagebutton next to it. Click here to make your first validator change. - A pop-up window will appear showing the OSMO you have staked, along with the current validator data. There, you have three options:
Undelegateto get your OSMOs liquid again;Redelegateto make the validator change;Delegateto repeat the process and add more OSMO tokens to staking.
- Click on Undelegate or Redelegate, depending on what you wish to do. In case you click on Redelegate, a new menu will appear where you can choose a new validator. You can search for the new validator manually or by searching for the name in Search Validator.
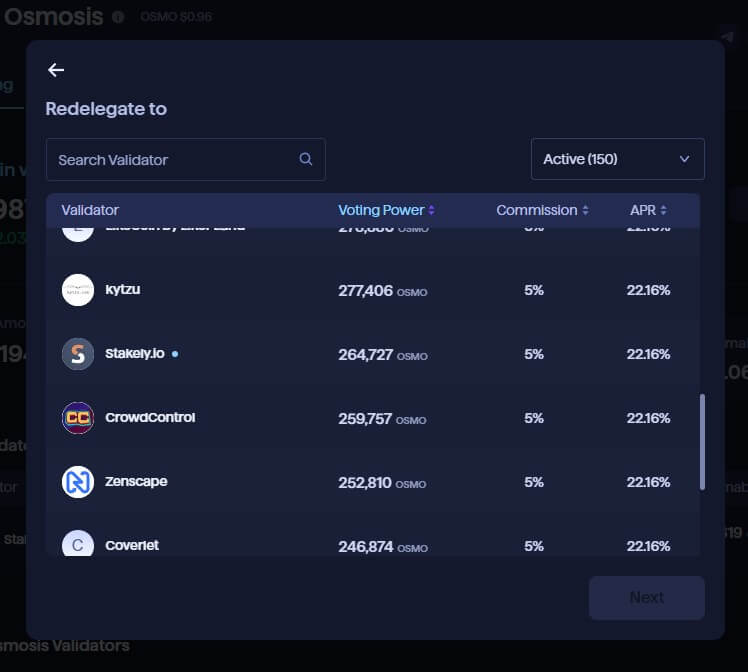
Just to the right you will find a filter with the Active option checked by default. You can select the filter to see the list of active, inactive, jailed or all validators.
-
Once you have made your new selection, click on the name of the validator and then click
Next. -
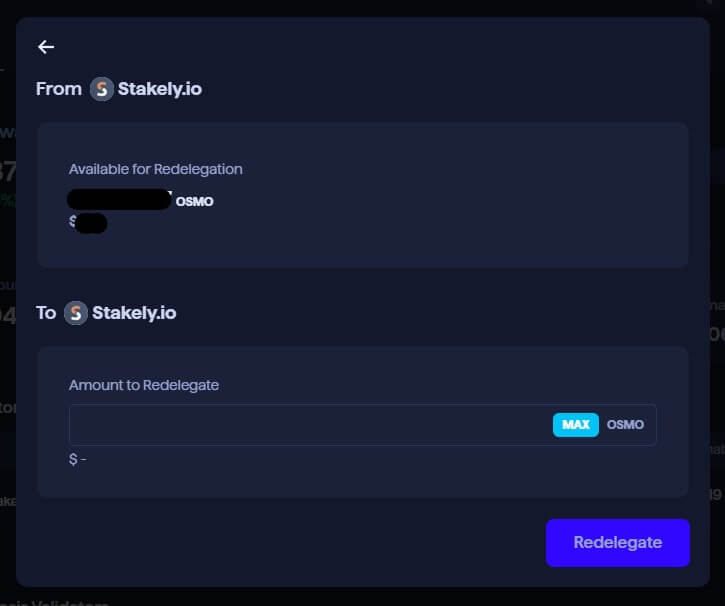
Make sure that "From" appears next to the name of the current validator and "To" appears next to the name of the validator to which you will move your tokens.
-
Select the amount you want to redelegate and press the
Redelegatebutton. You can redelegate a part or all of it; there is no limit to redelegate.
- Finally, confirm the transaction with your Keplr wallet. Congratulations! Once the transaction confirmed, you will see the action reflected in the My validators section.
How to claim OSMO staking rewards
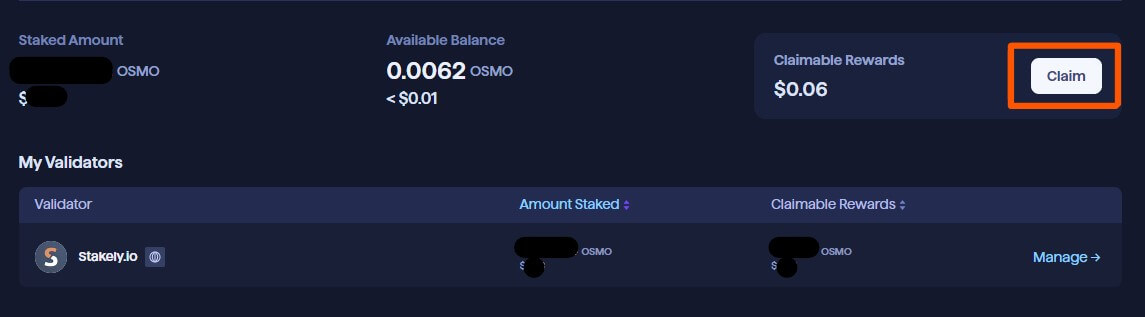
Staking is synonymous with generating passive income, which means that you will generate rewards day and night as long as you have chosen an optimal validator for your goals. Therefore, you can claim your rewards whenever you want by following these steps:
- Look for the blue button that says
Claimjust above the "My Validators" section.
-
Confirm Keplr's confirmation request, which will appear in a pop-up window asking for your authorization to claim your staking rewards.
-
That's it! Once confirmed by Keplr, your rewards will be available in your wallet.
How to restake OSMO: Automatic and Manual Mode
For some users, the idea of reinvesting their earnings with autocompound is very attractive for the long term, because it leverages the power of compound interest. Autocompounding involves reinvesting staking rewards and stake them again so that more and more of OSMO generates rewards.
For gradual growth, the process must be done at least daily and not all users have the time or patience to do this. Fortunately, there is also automatic restaking or autocompounding. Thanks to platforms such as Yieldmos and Restake, you can authorize us to do this for you. Both are exclusive to the Cosmos ecosystem.
Please note that these platforms are not authorized to use the funds in your wallet, but the validators themselves bear the costs of the network fees.
This step-by-step guide on how to stake OSMO is comprehensive, but it's designed to walk you through every question you may have and even has some tips on how to boost your passive income. We hope it has been helpful!
See you soon, cosmonaut!


