


How to stake AZTEC with MetaMask
Follow this step by step below
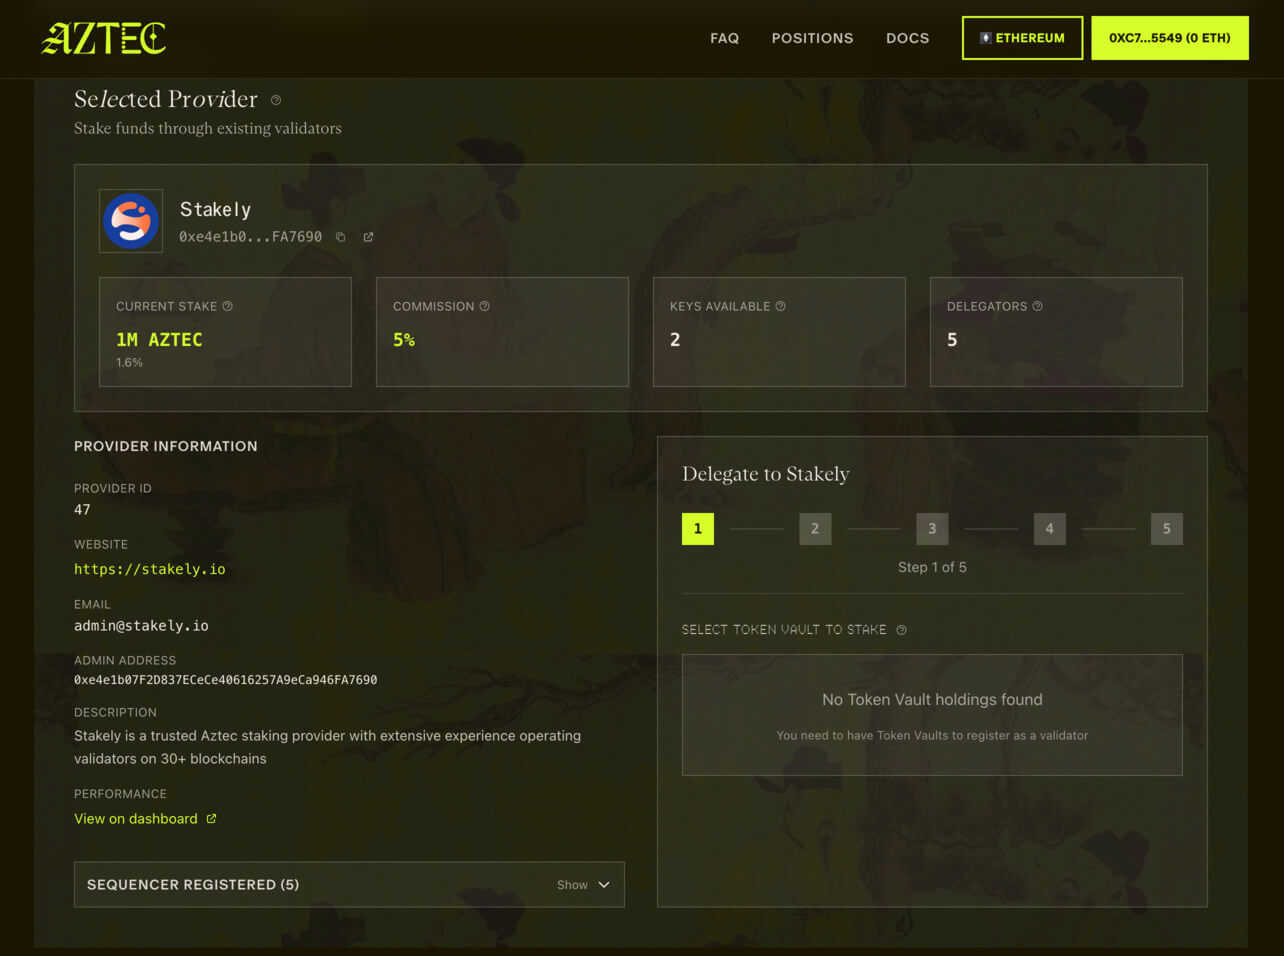
Access the Aztec staking panel
Open the staking platform to begin the delegation process. Make sure your wallet is connected.
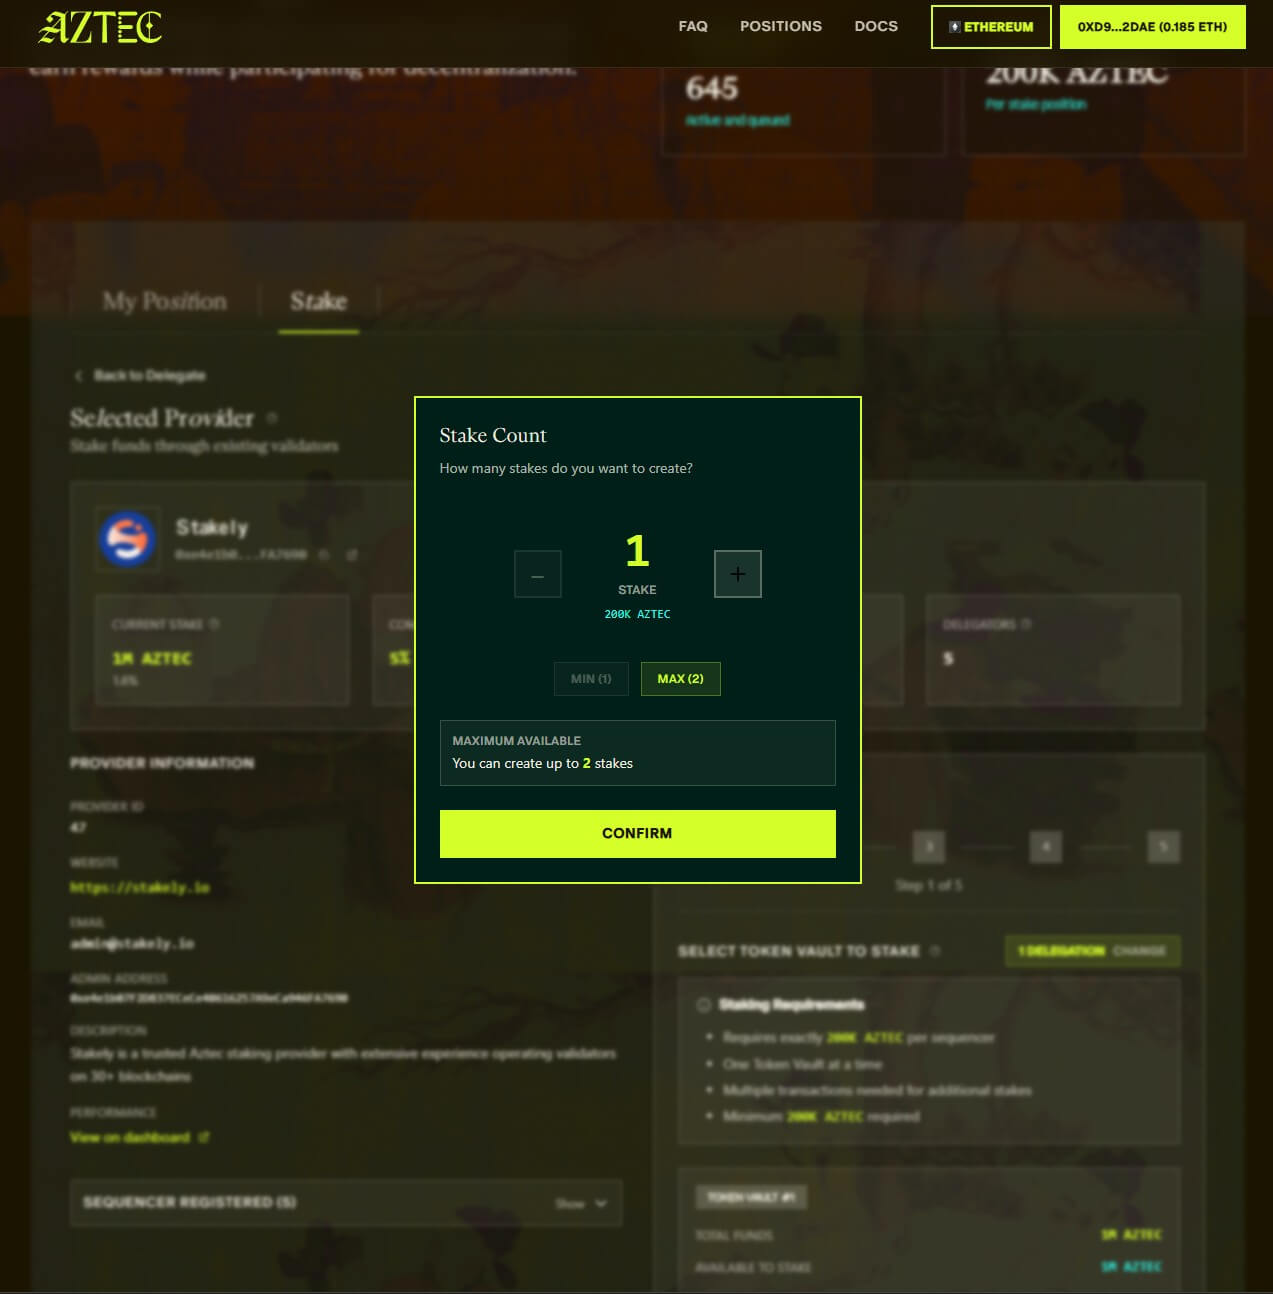
Select how many sequencers you want to create
Choose the number of sequencers you want to stake with. Each sequencer requires exactly 200,000 AZTEC. The interface will show the maximum you can create based on your available balance. Confirm your selection to continue.
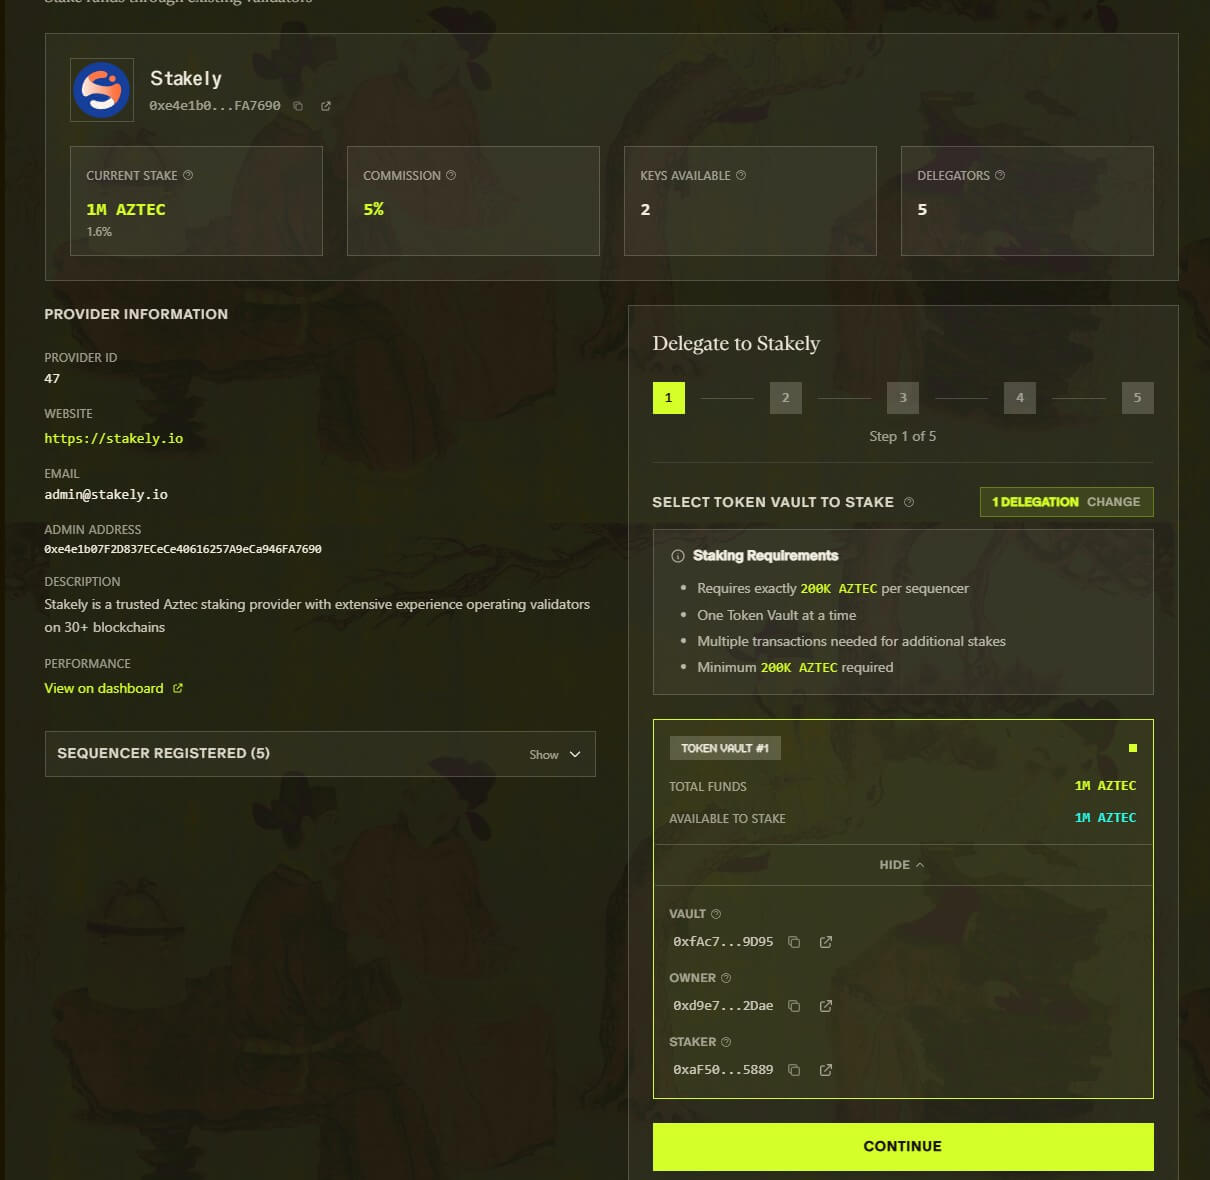
Expand the Token Vault and enable “Total Funds”
In the bottom-right box, expand the Token Vault details. Enable the “Total Funds” toggle so the interface detects your available balance. This step is not intuitive, but it is required to activate the Continue button.
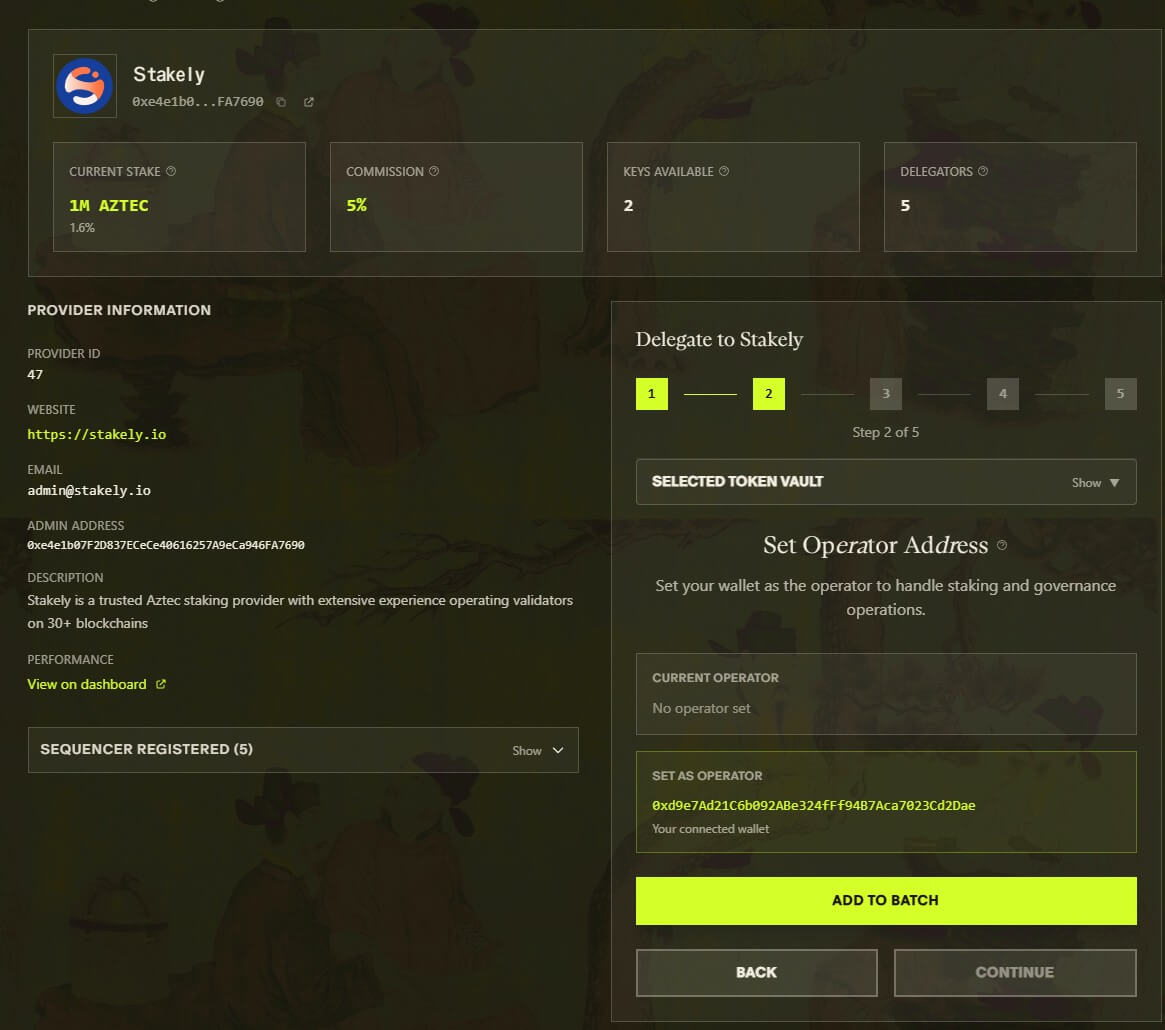
Set the operator address and click “Add to Batch”
The system will ask you to set the operator address. Confirm the address shown as your connected wallet and click “Add to Batch” to add this action to the transaction queue.
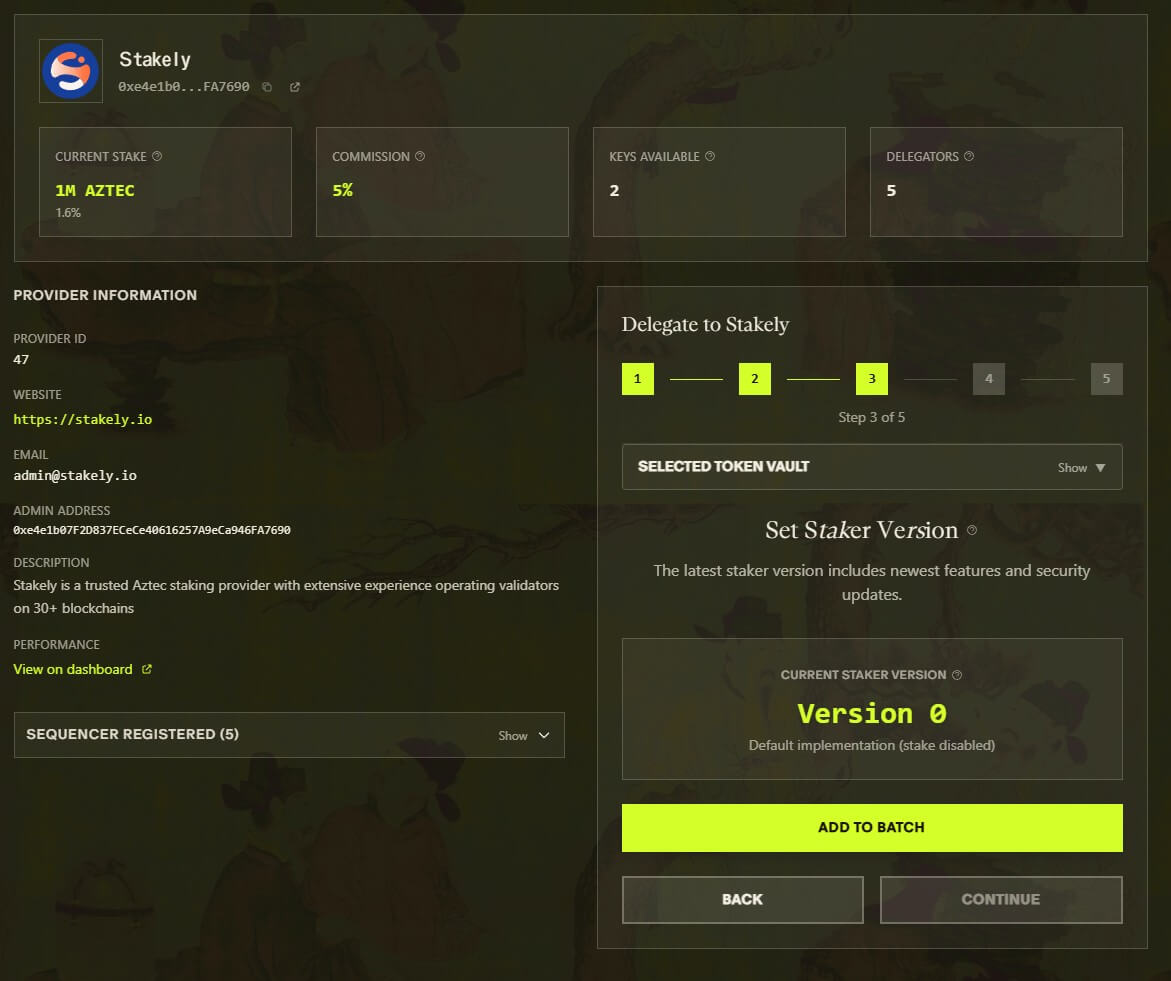
Upgrade the Staker Version and click “Add to Batch” again
In this step, the interface only displays the current staker version. There is nothing to configure or select. Simply click “Add to Batch” to include this action in the transaction queue.
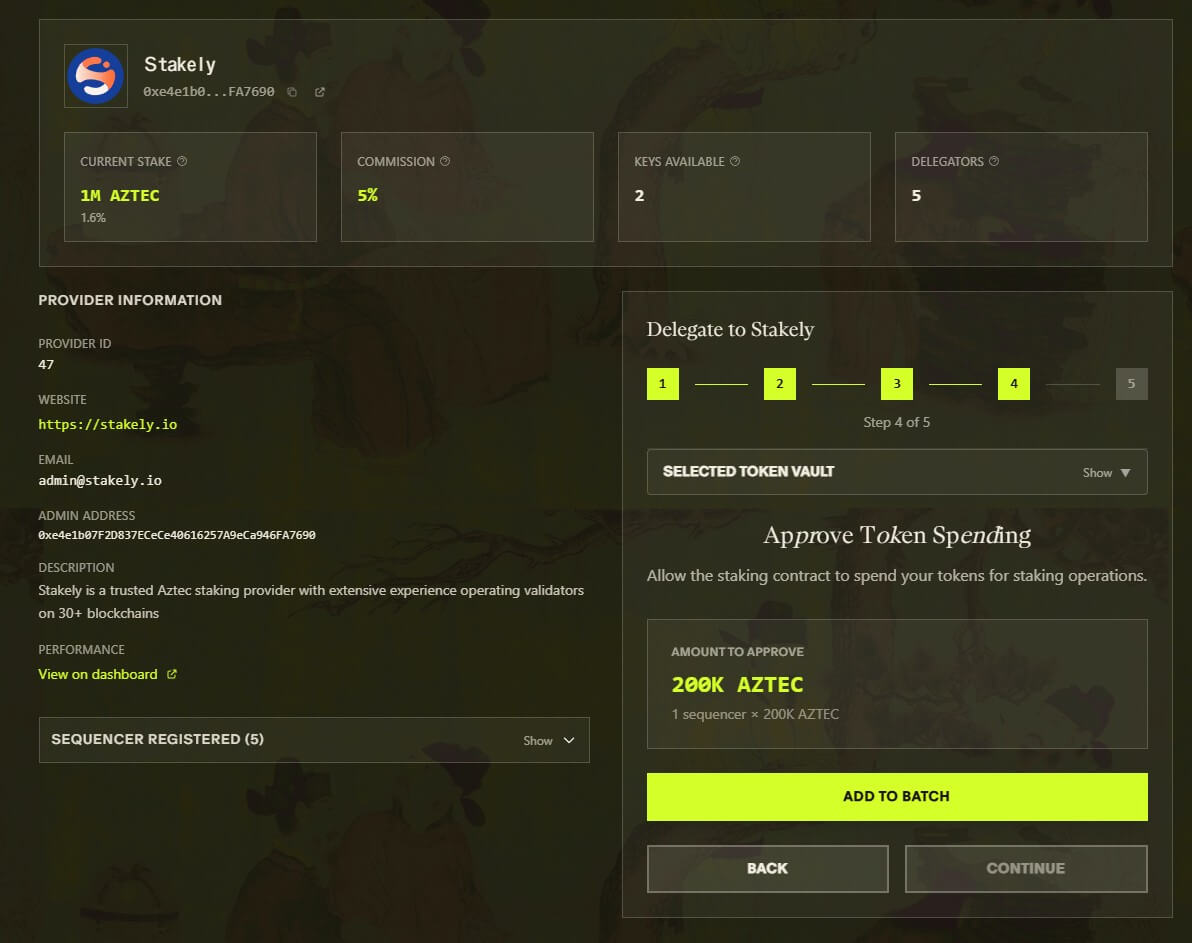
Approve token spending and click “Add to Batch”
The interface will now ask you to approve token spending for the staking contract. Check the amount to approve, which should match the number of sequencers multiplied by 200,000 AZTEC, and click “Add to Batch” again to queue this approval.
Open the Transaction Queue from the bottom-right icon
Click the small square icon in the bottom-right corner to open the Transaction Queue. This panel shows all pending actions before execution. Press “Resume” to execute the entire batch. Your wallet will open multiple pop-ups automatically. Sign each transaction until the queue is fully processed.
Delegation complete
Once all signatures are approved, the interface will confirm that your tokens are now delegated to Stakely and earning rewards!


