How to stake CELO with Cello Wallet
Follow this step by step below
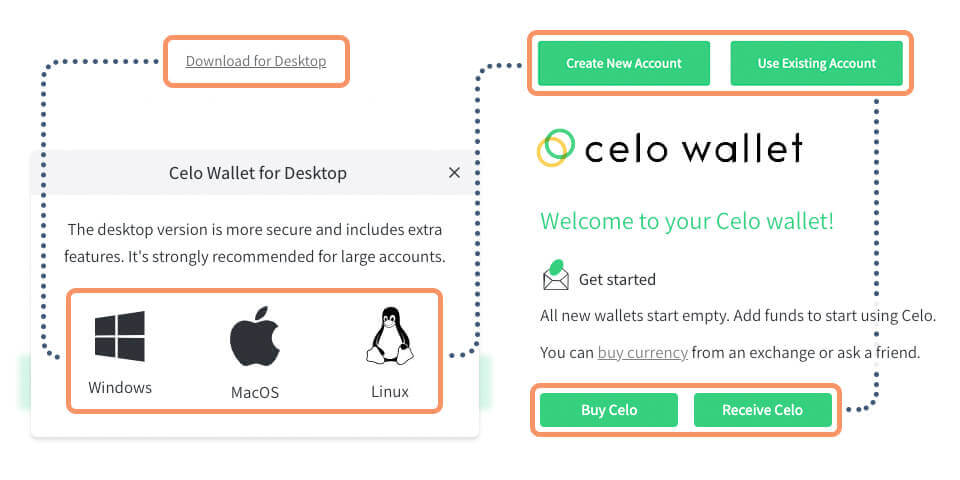
Install Celo Wallet Desktop
Install the Celo Wallet version for desktop. You can create a new account, import an account from seed, or connect a Ledger device (with the Celo Ledger App installed and opened). Remember to securely save your password.
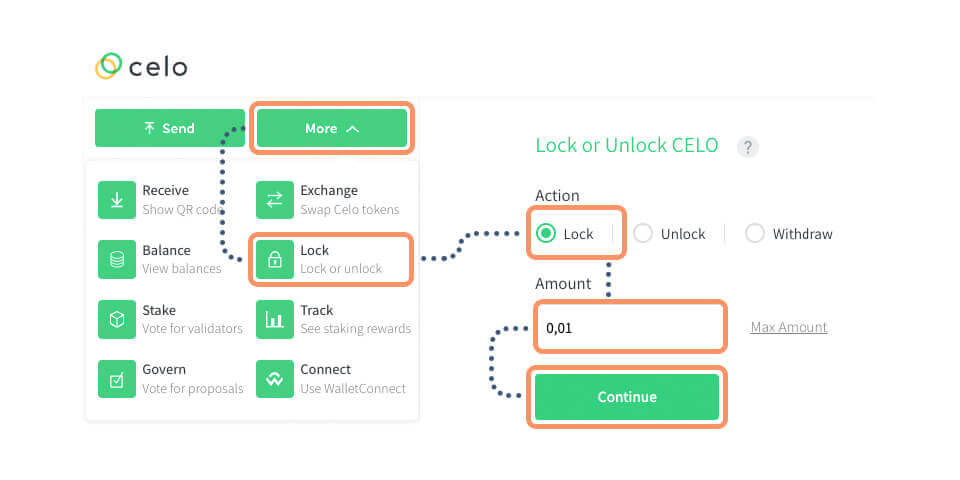
Lock your CELO tokens to start staking
Enter your Celo Wallet account and click on More, then click on Lock. Enter the amount you desire to lock to start staking and click on Continue. Remember to leave some CELO unstaked to pay future fees. Confirm your locking transaction and go back to the home page.
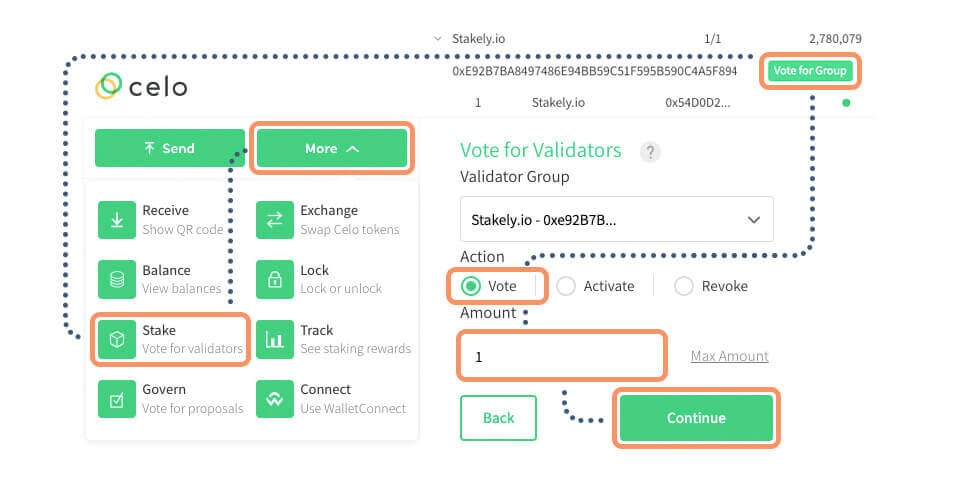
Select Stakely to stake CELO
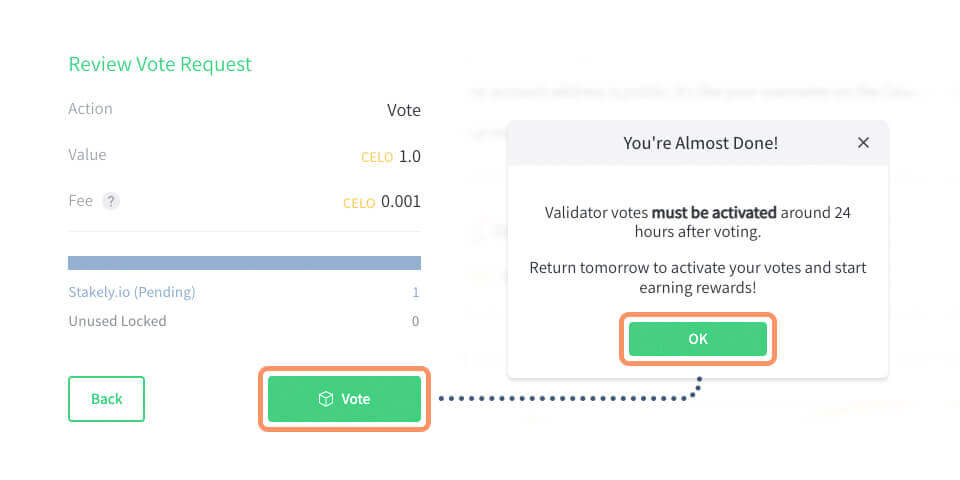
You will see a list of all validators to which you can delegate, but you will have to choose one. Click on the See/Change Your Votes button and choose Stakely! Enter the total amount of the locked tokens you want to stake and confirm your transaction.
Activate your delegation
You will have to wait one day to activate your staking. Come back tomorrow and enter your wallet again and confirm the popup that will show up to confirm your stake. Once you activate it, you will start receiving rewards!